
In this article you will learn how to add a signature in Outlook. As you all know, signatures are a very important part of our Outlook email. It reveals our identity. In Outlook email signature is as important as our introduction. In this article we are going to learn how to change a signature in Outlook in a very short and quick way. So, let’s dive deep how you can set up the outlook email signature.
Related: How to recall an Email in Outlook
Table of Contents
YouTube Video: How to Add a Signature in Outlook
To make it very convenient for you we have made a YouTube video on how to add a Signature in Outlook. Please click the above link, have a look, and be sure to subscribe.
How to add a signature in Outlook – Desktop Windows
Follow the simple steps to add a signature in Outlook. After this, we will go through the detailed guide along with a visual presentation.
1- Open Outlook App on your PC
2- Go to Home Tab and Click New Email on the ribbon in the top left corner of your screen
3- From the Message Tab, Click on Signature from the ribbon. From the drop-down click on the last option Signatures
4- A new window will open. Click on New, type the name of your signature
5- Add your desired signature and format it according to your needs
6- Now, hit save. Congrats, you have created your Signature successfully
7- To select your signature click on signature in a new email and select the signature you created. It will be shown at the end of your email.
Related: You can have a look at this Microsoft Alternate Guide for adding Signature.
How to add a Signature in Outlook – Detailed Steps for Desktop Windows
Here are the detailed steps for how to add a signature in outlook.
Step 1. Open Outlook App
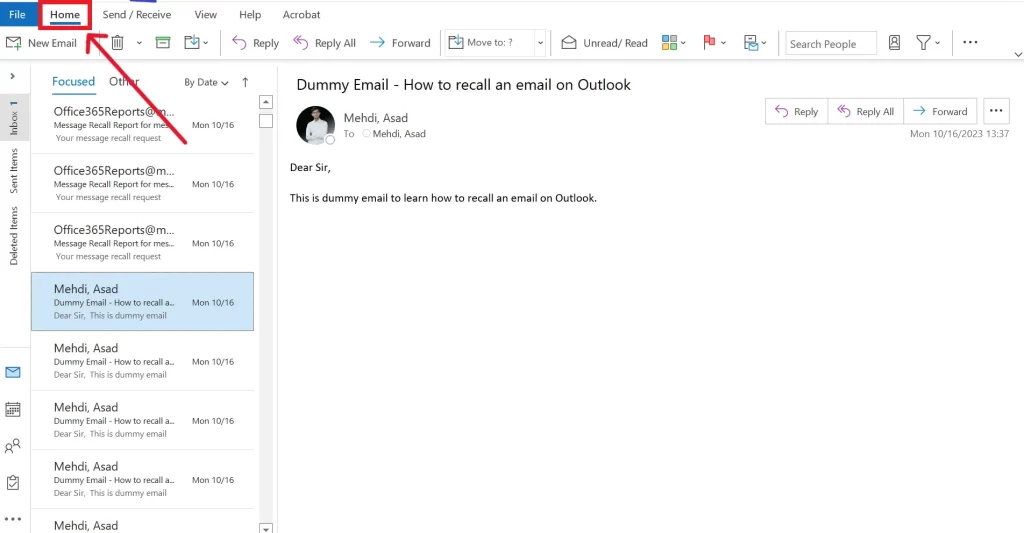
First of all, Open Outlook on your PC. You will be on Home Tab by default but if you are not then go to Home tab by clicking on it.
Step 2. Open New Email
When you are in the Home tab, you will find New Email on ribbon in the top left corner. If you find New Email somewhere else click on it.

Step 3. Open Signatures
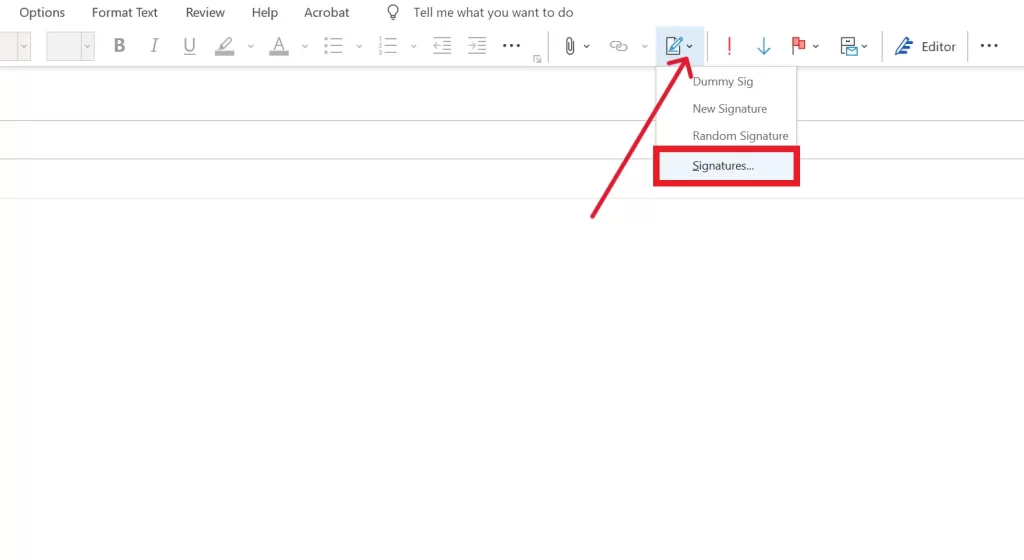
After you have opened the New Email. Now you will be on the screen that is letting you to type your message and send it to the desired recipient. You will be in the Message Tab by default, but if you are not in the message tab then go to message tab. You will find the Signature icon on the ribbon in almost the middle of the ribbon. Click on it and the drop-down will open. You need to select the last option Signatures.
Step 4. Adding New Signature
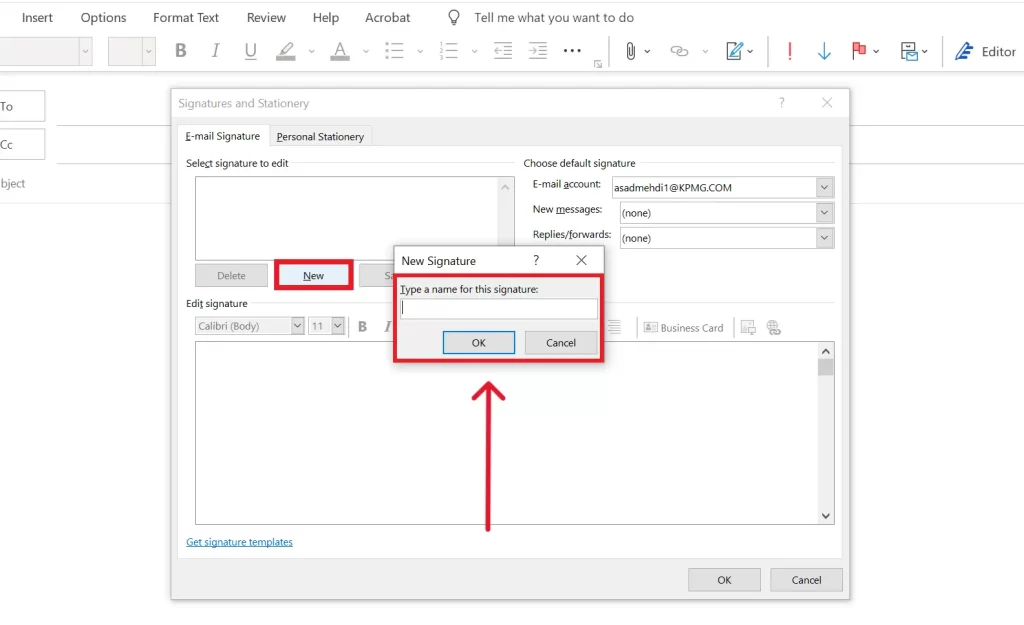
A new window will open. Now click on New. A new small window will open, here you will type the name of your signature. As you can use multiple signatures on Outlook. So, you can name it according to your requirements. Suppose you can use different signatures for internal and external emails. After typing the name, hit enter.
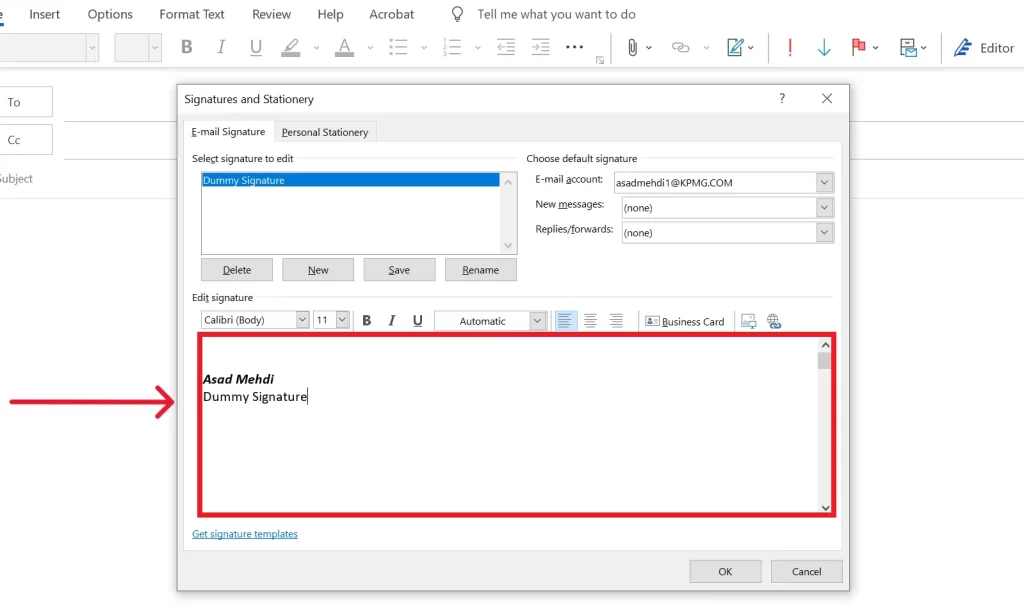
Step 5. Formatting Signature
After creating a new signature you will see an empty editor box below New where you can add and format new signatures as you like. You can type a signature and change its font size and style as you like.
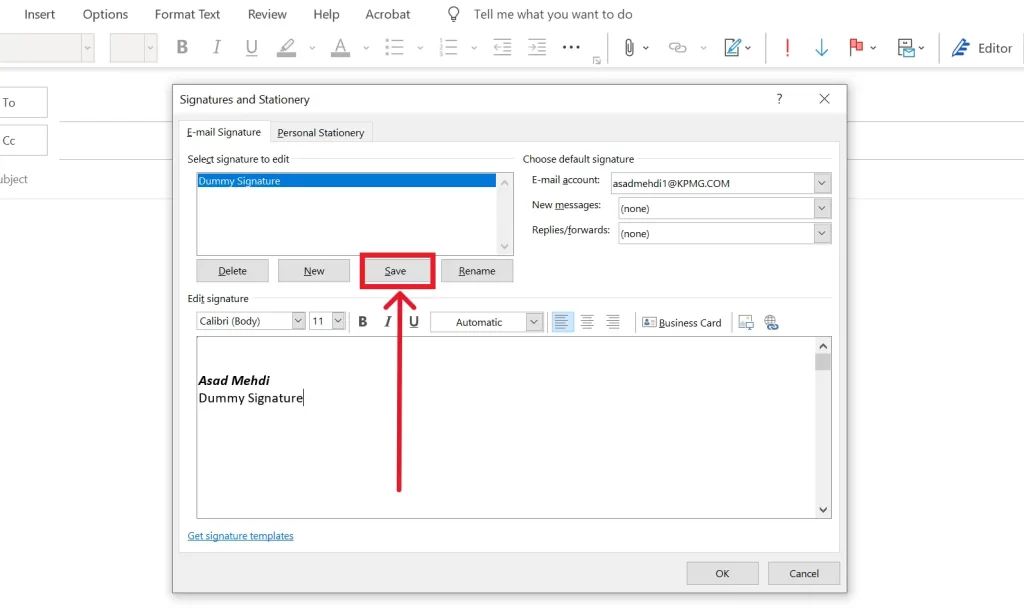
Step 6. Save your new Signature
Now, you have successfully created your signature. You can simply hit the save button to save your signature. You can customize and update your signature whenever you want by following all the above steps and editing the text in the editor box and hitting save.
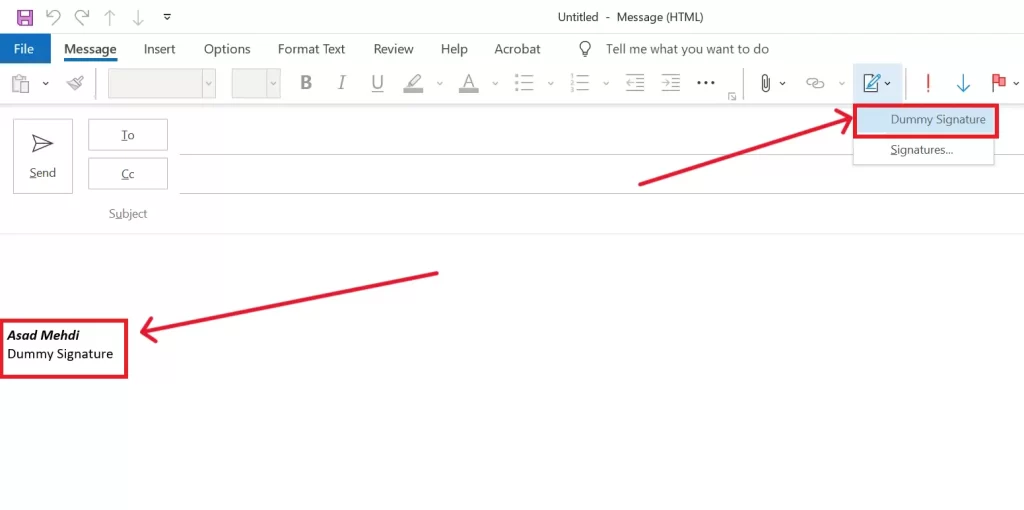
Step 7. Select the desired Signature in email
Now, as you have created your signature. You can use it as and when you will send email. If your signature is not appearing in the new message. Just select your signature from the drop down and it will appear at the end of your message every time.
Conclusion
In conclusion, adding a signature in Outlook is a fundamental aspect of your email communication, as it reflects your identity and professionalism. This article has provided you with a concise yet comprehensive guide on how to change or create your signature in Outlook. By following the simple steps outlined above, you can quickly set up your Outlook email signature, enhancing your emails with a personalized touch.
Your signature is not just an electronic formality; it’s a representation of who you are in the digital realm. So, take advantage of these easy steps to make your Outlook emails more professional and distinctive. If you found this guide helpful, you might also be interested in learning about other Outlook features, such as how to recall an email in Outlook.
Related: How to Change Size of Google Slides

3 thoughts on “How to add a signature in outlook – Easy Tutorial 2023 (updated)”